Cute Girls Room Wall Paint Idea for your Princess
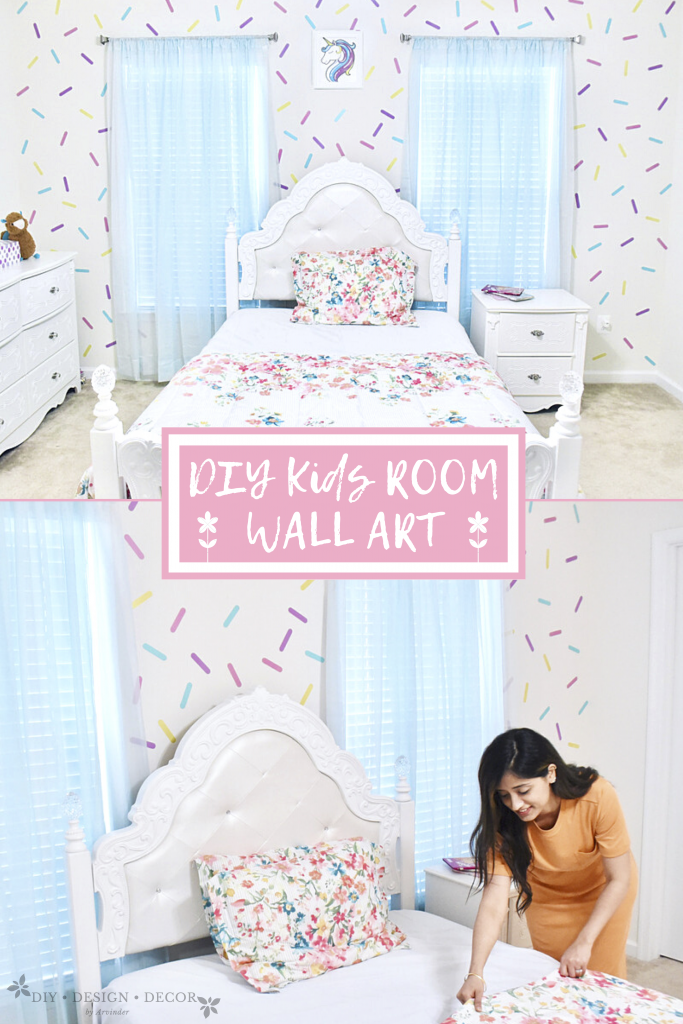
What’s more fun than decorating your baby girl’s room, right? This Girls Room Wall Paint Idea will make your princess super happy.
I had the opportunity to decorate the room for my youngest client. Her requirements were pretty straight forward “Please make my room fun and full of colors”. I thought to myself “what could be more colorful than cupcake sprinkles?”.

What you need?
For making the Stencil:
- Plastic Sheet/Laminate Sheet
- Printed Design
- Blade
- Scissors
- Cutting Mat
- Marker
For painting:
- Stencil
- Painters Tape
- Yellow Paint
- Pink Paint
- Blue Paint
- Purple Paint
- Paint Brush
- Small Bowl for Paint
How to make this?
Step 1: Getting Ready to make your own Stencil
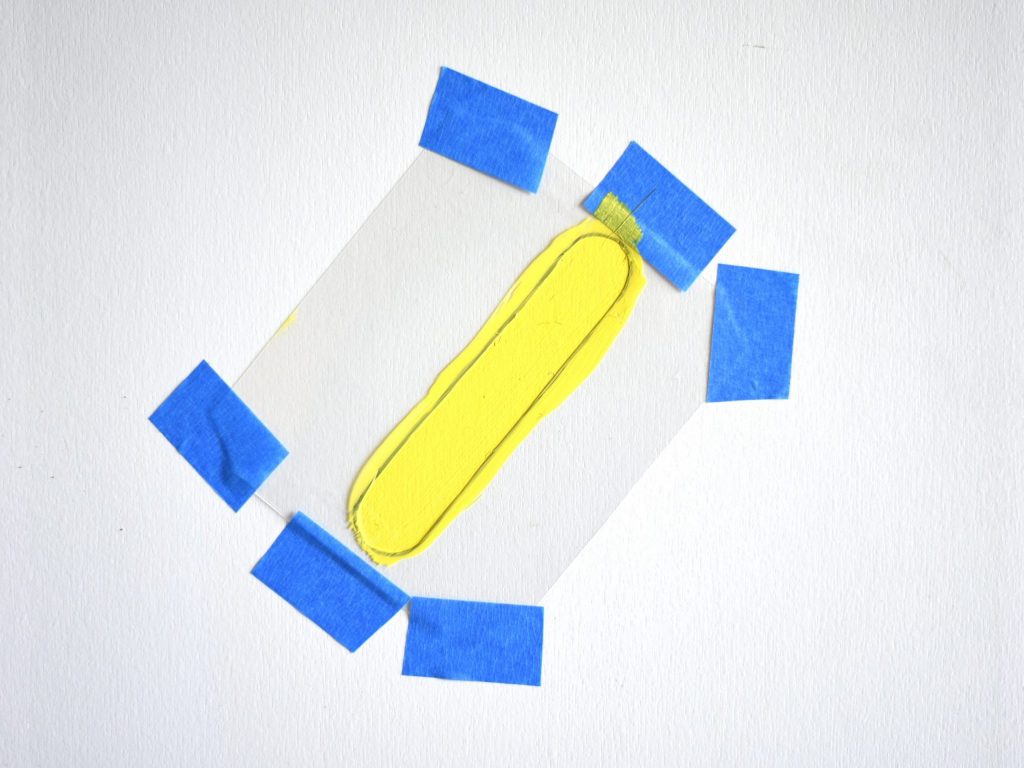
Print out the design (capsule shape) on a sheet of paper. The size of the sprinkle should not be too large or too small. I have attached my copy of the sprinkles. Feel free to download and print. My copy has two sprinkles on a Letter size page.
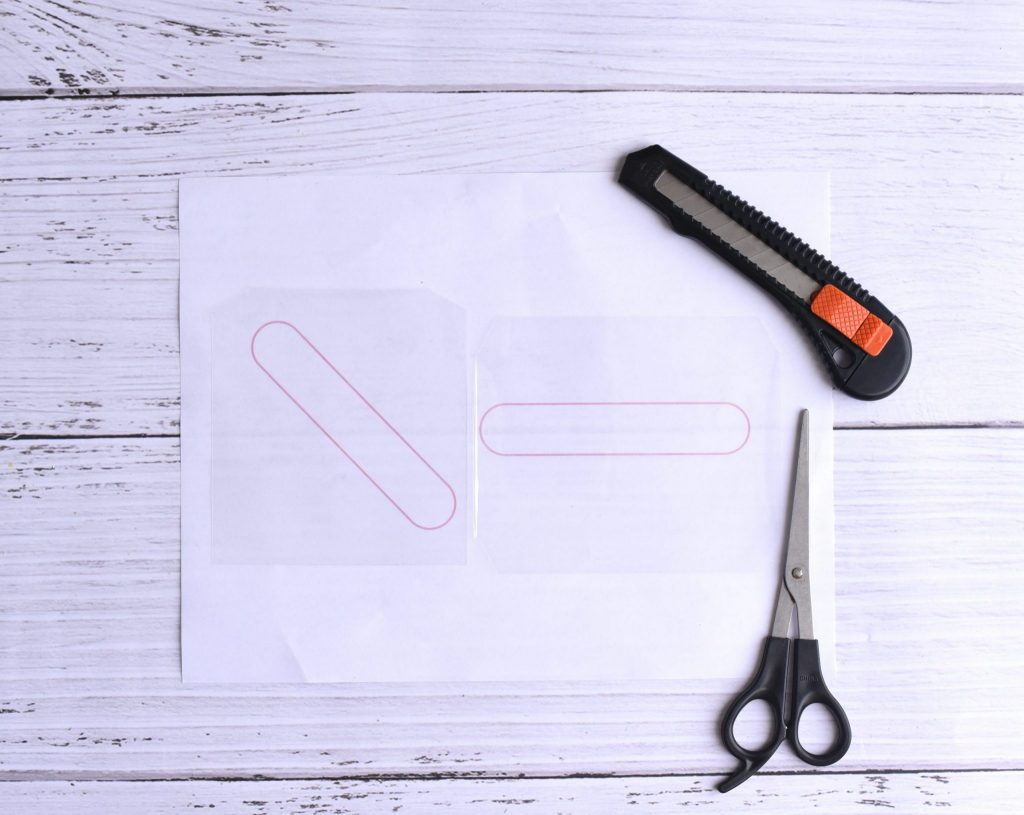
Place your printed design on a rubber cutting mat with the design facing up. Tape the paper to the rubber mat.
Now cover the design with the plastic sheet/laminate sheet and secure it in place with tape.
Using a marker, trace your design on the plastic sheet.

Step 2: Cut out your design
Using blade, trace the two parallel lines of the sprinkle. It should cut easily. If it doesn’t, apply pressure slightly.
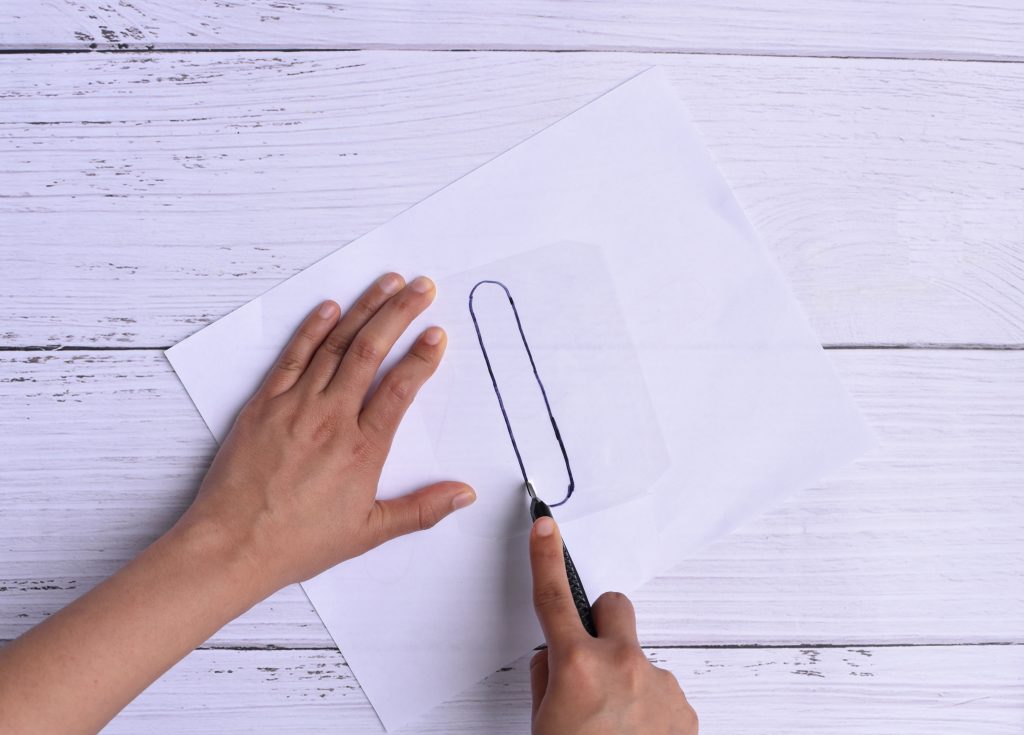

Slide your scissors through one of the slits and cut around the marked curved edge. Do that for both the ends of the sprinkle.

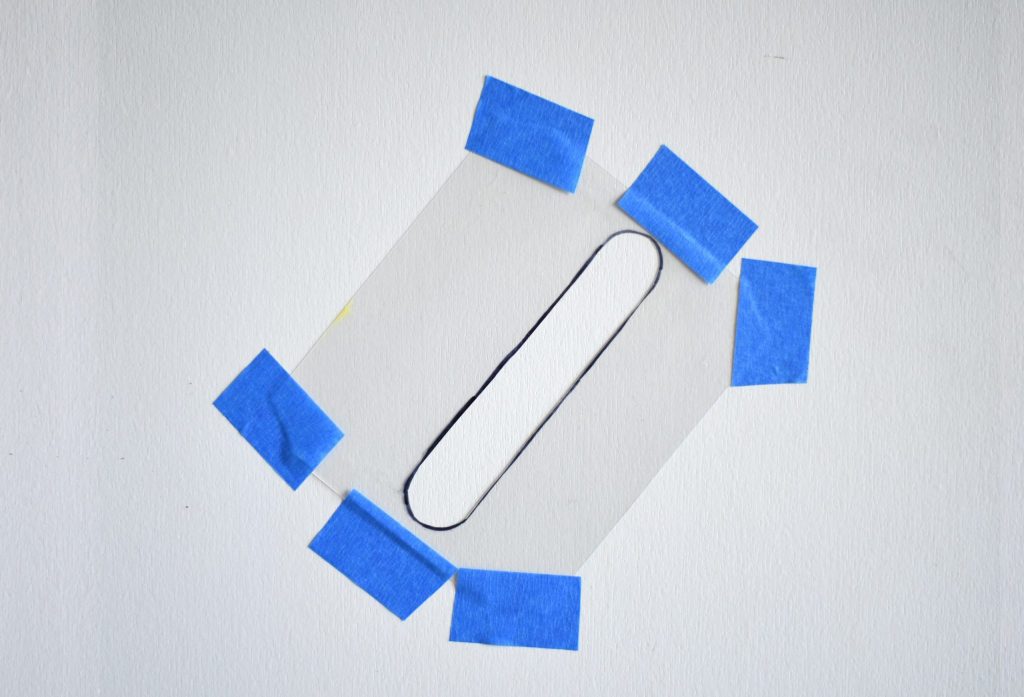
Your stencil is ready. Make four to six stencils. Ideally, one or two stencils for each color. This way you don’t have to keep removing and sticking the stencils for coloring.

Step 3: Prep for Paint
Wipe the walls with a damp towel or sponge and allow it to dry. Use painters tape to mask off your moldings, sockets and ceilings. Press the tape evenly so that the tape sticks well. This is to prevent any bleed-through. Cover the floor with drop cloth or plastic sheet to protect the floor from paint drips and splatters.
Step 4: Begin Painting
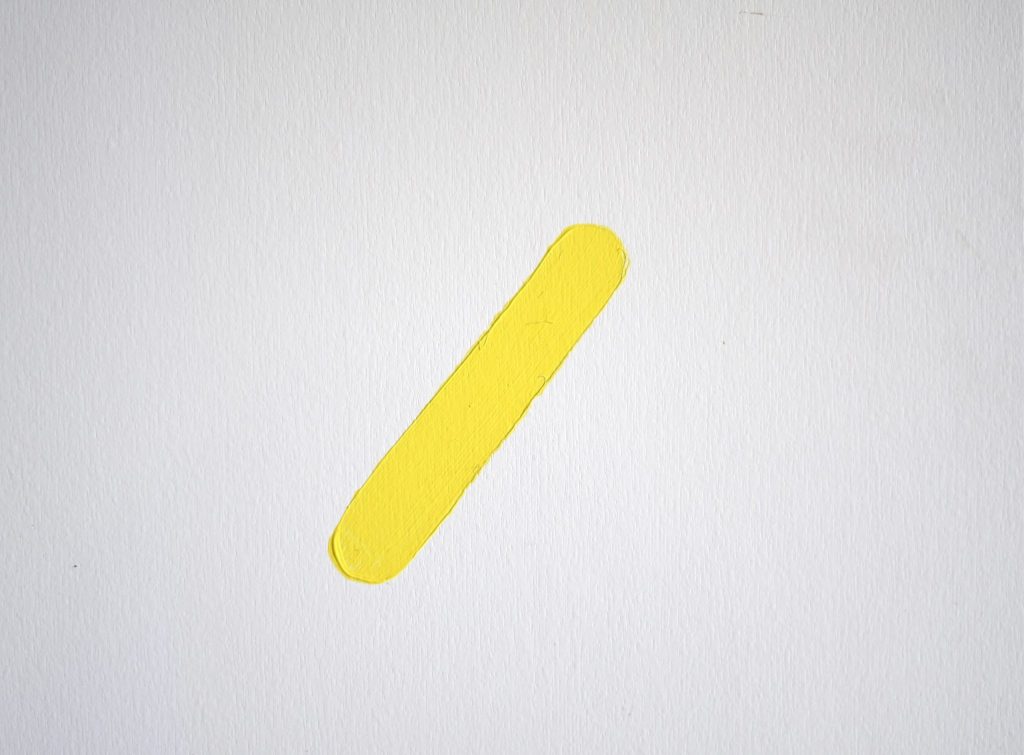
The good thing about this design is that it does not require symmetry. So you can start painting from any corner of the wall and not follow any pattern. I started painting from the top left corner.
Place your stencil on the wall and use painters tape to secure it in place.
Pour the required paint color in a bowl. Swirl your paint brush in the bowl and start to fill in your stencil. Be very careful to not have too much paint on your brush or else it will drip.
If you have created 4-6 stencils, this is the time to use. While the paint is drying, start painting your other sprinkles.
When the paint is a little dry, remove your stencil and clean it if required. Reuse as needed. Do not use the same stencil for two colors. You will end up with mixed colors.
Tip: Keep track of your colors. Check for surrounding sprinkle colors and avoid repeating them.
Step 5: Clean Up!
After the paint dries completely, remove the painters tape. Clean your brushes with warm soapy water.
Your accent wall is ready. Hope your princess loves it!

Tips
- Use a good brush. I bought a paint brush from Dollar Store and it kept shedding.
- Do not use the same stencil for two colors. If there is paint left on the stencil, you will end up with a mixed color.
- Stick your stencil properly to the wall before you paint. If not, the paint could smudge
- First time coloring? Practice on a wooden board first.
- Stencil painting requires patience. It can be a very long process. Like this one took me 48 hours to finish. If you need something quick, hunt for cute decals 🙂
How are you so awesome ❤️
Cute makeover! Well explained… Will definitely do it for my kids room!