You can design your own sharpie mug for every occasion; be it Valentine’s Day, Anniversary, Mother’s Day, Father’s Day or even Teacher’s Appreciation Day. What could be more special than gifting a handmade personalized mug to your loved ones?
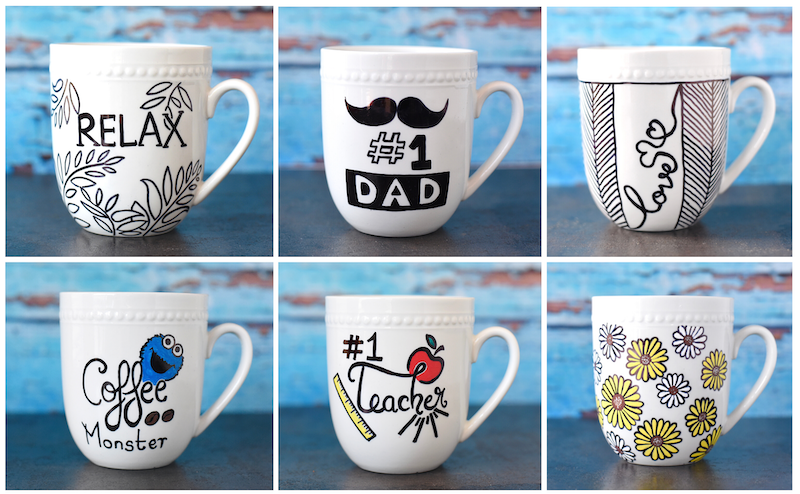
These cute DIY Sharpie Mugs are very easy and quick to make. I have posted 6 sharpie mug design ideas in this post and will keep adding more in the future. Make your own cute mug by following the DIY Mug Painting instructions below.
What you need?
- Sharpie Paint Pens or Asani Acrylic Paint Pens
- Rubbing alcohol (for cleaning the mug surface)
- White mugs (you can get good ones at Walmart or Target)
- Paper towels
- Graphite Pencil
- Tape
- Oven (to bake your personalized sharpie mug designs and make them last longer)
How to Design the Sharpie Mug?
Step 1: Prepare Your Mug(s)
Wash your mug(s) well and dry it.
Clean your mug again with rubbing alcohol and allow it to evaporate (this takes a few minutes). Avoid touching the area you intend to put the paint on, your hand oil can cause the paint to not adhere to the mug properly.
Step 2: Print and Shade Your Design
Take a print out of the designs you want to trace on your Mugs.

Now, shade the reverse side of your printout with a number two graphite pencil. You may need to go over it more than once. You can use a Regular pencil as well but a graphite pencil makes the tracing easier.

Tip: To get more graphite onto the paper faster, put your pencil on a slight angle. Make sure you have a heavy layer of graphite everywhere your image appears on the front side (hold it up to the light to see).
Step 3: Transfer Your Design onto the Mug
Turn the paper back over and tape it onto the mugs. Be sure to get it centered and straightened before you tape it. Taping keeps the printout in place and prevents smudging.
Pressing down hard with the tip of the pencil, trace your image. I pressed hard and traced around the outside of each letter twice. As a result, the graphite on the reverse side of the paper transferred right onto the mug’s surface.

Step 4: Paint the Mugs using Sharpie
Remove the paper printout from the surface. Remove just one end, or a corner, so you can see if it transferred enough before removing it completely.

Use a paper towel with rubbing alcohol to clean any smudge marks.

Use a Sharpie Paint Pen and go over your transferred design. Easy-peasy!

If you are comfortable with free-hand drawing then draw directly onto the DIY Sharpie mugs with your Sharpie Paint Pen and skip Steps 2, 3 and 4.
Don’t worry when you make a mistake. You can easily clean the paint using rubbing alcohol.
Please Note: Regular Sharpies don’t work as they wash off! Use Sharpie Paint Pens/ Acrylic Paint Pens only.
Step 5: Dry and Bake Your Mug
- Allow your completed mug to dry for at least 24 hours before baking. This will ensure proper adhesion of the design to your mug.
- Put your mug in a cold oven, then turn up the temperature to 450°F, and bake for 30 minutes.
- After baking, turn off the temperature and leave the mugs in the oven for another 30 minutes. Then crack open the oven door (for ventilation) and keep the mugs in the oven overnight.
What you are doing here is letting your mug gradually warm up and cool down with the oven. Sudden change in temperature can cause the mug to crack.
Also, the mugs can stay really hot for a while so avoid touching and don’t burn your fingers.

Tip: These painted mugs dishwasher friendly when placed on the top rack but I would suggest hand washing them.
Here are other designs that you can try 🙂


If you like doing DIY, check out some of my cool ideas here.